| Starting a session | ||
|---|---|---|
 | Chapter 1. Quick Introduction |  |
| Starting a session | ||
|---|---|---|
| | Chapter 1. Quick Introduction | |
Lets have a look at a screenshot of the jEdit DocSynch plugin first (GUI setup in the screenshots: Metouia L&F from the LookAndFeel plugin and Windows XP toolbar icons):
You will also need the IRC plugin window. A good setup is to put the DocSynch window at the left or right position (Utilities > > jEdit > Docking or with jEdit version 4.2 or higher, right-click on the dockable button and select one of ) and the IRC window at the bottom position. The DocSynch window has a vertical layout and is thus not suited for the top or bottom area.
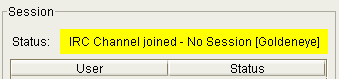
The first step to do is to go to the IRC window, choose a nickname, connect to the server of your choice and join a channel:
/nick your-favourite-nick
/connect your.server.com #channel
If you get a message like "Your nickname is already in use", simply try another nickname with the /nick command. For more information about IRC commands, please read the documentation of the IRC plugin (also look at Section , “IRC functionality”).
Wait for the server to finish. The DocSynch window should now show that you are connected by having a yellow label at the top showing the name of the IRC server.
If you have read Section , “DocSynch Terms”, you know that there are two user roles: master and client. The user who starts the session, becomes the master and is the one who chooses the documents to be shared. Therefore the following steps are only for the master:
Open the appropriate documents in jEdit
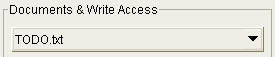
Select the document you want to add in the list box in the middle of the DocSynch window
Click on the button (showing a plus symbol)
Enter a name for the document. You can use the given filename.
Press enter / click OK and the document will be added to the list.
Do this for each document you want to add. If you want to add all currently opened buffers, simply press the button (showing two plus symbols)
![[Note]](resources/note.gif) | Note |
|---|---|
You cannot add unsaved (new) buffers. Buffers must have an according file on the disk to work with DocSynch. | |
The button below the user list will show what you can do: for the first one it will "start" the session, after that all others can "join" it.
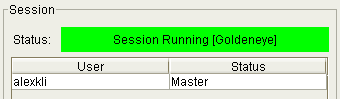
Master. When starting the session via a click on , you will notice the status label getting green.
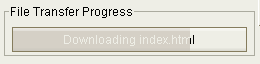
Client. When the master has started a session, you will notice that by the green status label and the master being added to the user list. After you have clicked on , the documents of the master will be transferred to you (if there are any). You can see the progress of the transfer(s) at the bottom of the window. When all transfers have finished, you should see the central button labeled . You are now joined as client. If you encounter an error (File could not be transferred) disconnect from the IRC server and try to re-join. If the error still occurs, check if a DCC send from the master to you works (there may be problems with a firewall) (look at Section , “Troubleshooting”).
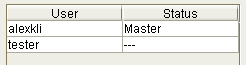
The master will see the progress for any joining user as well. Finally you will see all joined users in the user list:
| |  | |
| DocSynch Terms |  | Editing the documents |